Monster Hunter World Zorah Magdaros Armor - How to Get the Zorah Magdaros Armor in Monster Hunter World


The Monster Hunter World Zorah Magdaros is a threat right from the very outset of the game, and the entire first act of the main story basically revolves around this gigantic Elder Dragon. In this Monster Hunter World Zorah Magdaros guide, we'll be walking you through how to repel Zorah Magdaros, as part of the 'A Colossal Task' mission, as well as how to craft MHW Zorah Magdaros armor in MHW.
Should you instead need anything else on the complex game of Monster Hunter World, including how to safely capture a monster in a trap, as well as how to track down a monster quickly using the Scout Flies, head over to our Monster Hunter World guides walkthrough hub.
How to Defeat the Zorah Magdaros in Monster Hunter World
The Zorah Magdaros is the biggest beast in MHW, the the plot of the entire game mostly revolves around trying to uncover the mystery surrounding the Elder Crossing, an event that has caused the Zorah Magdaros to arrive in the new world. This guide might be focusing on taking down the Zorah Magdaros in the ‘A Colossal Task’ mission, head over to our additional guide on the One for the History Books mission, if you need help on taking down the Zorah Magdaros in your first encounter with it.
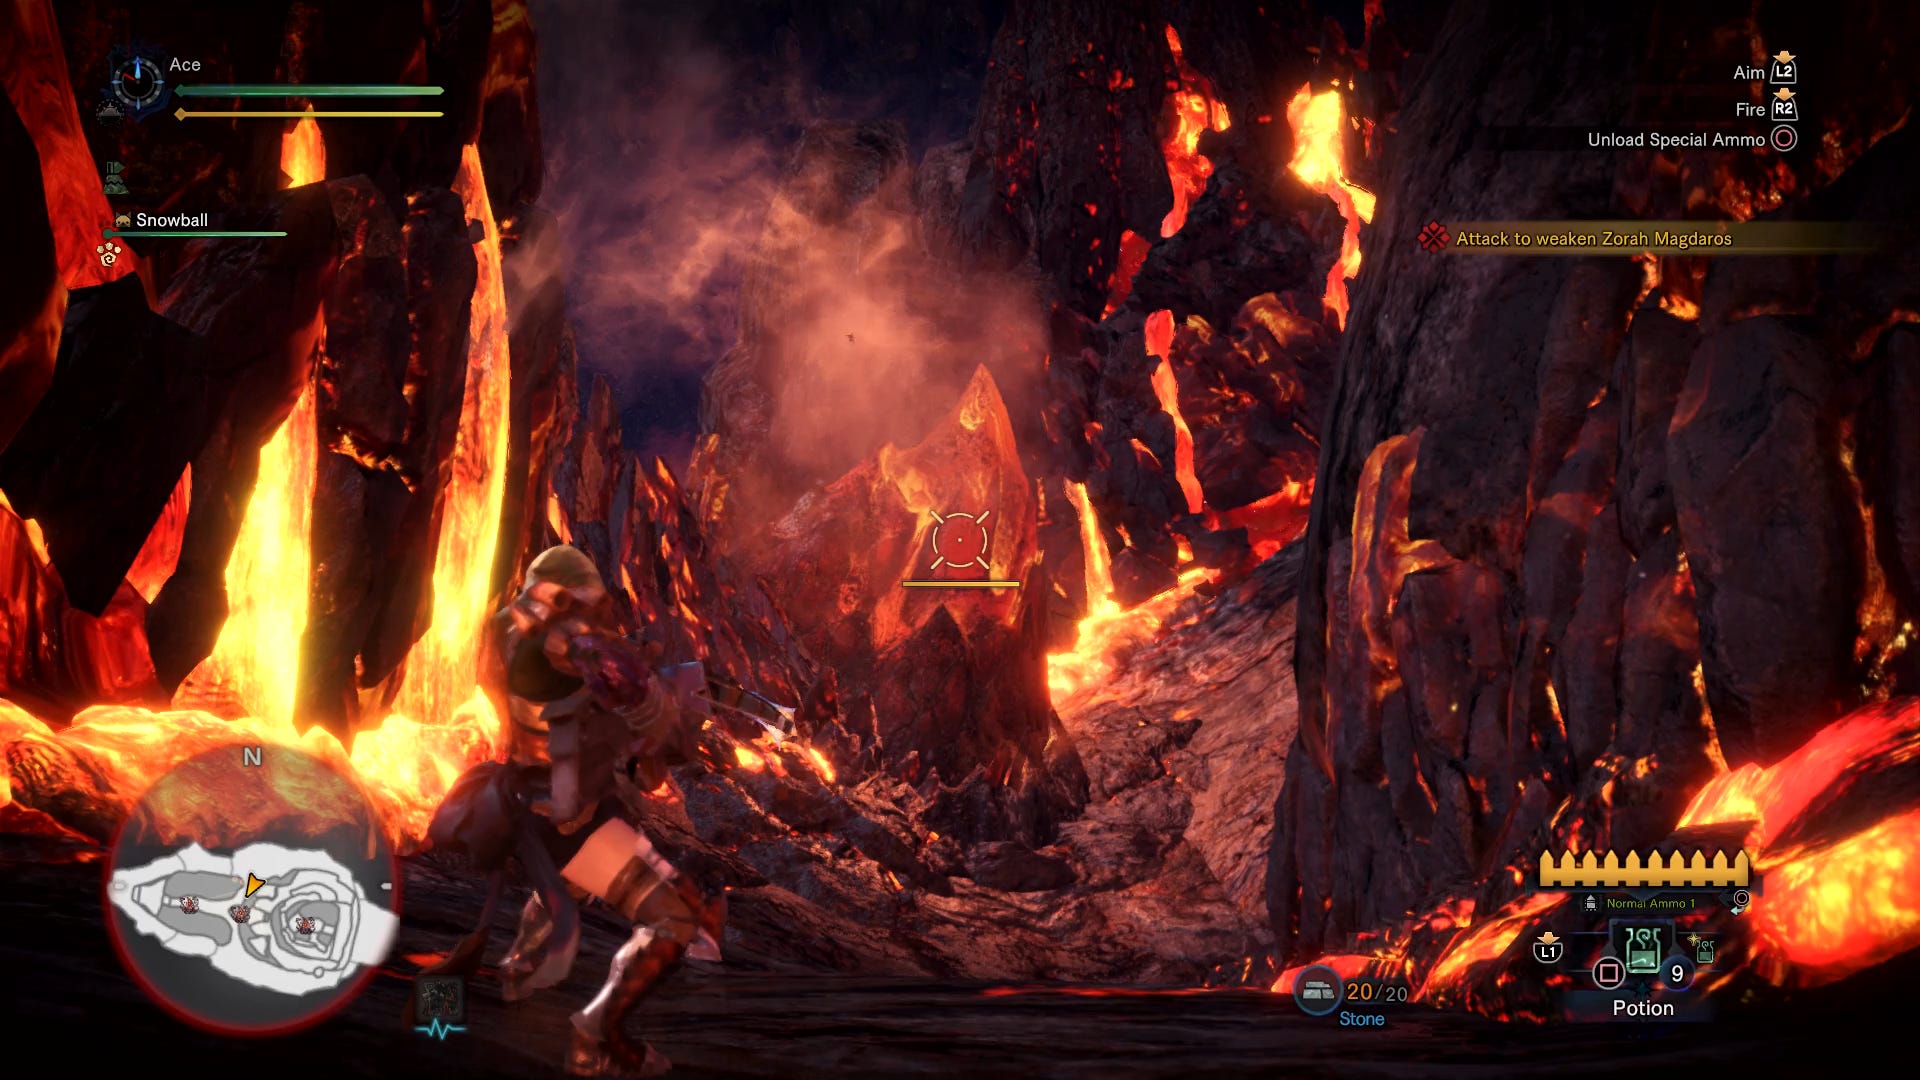
In the Colossal Task mission, the entire Fifth Fleet bands together, in the hope of driving the Zorah Magdaros back out to sea. You’ll want to bring some agile, bladed weapons with you for this mission, so the Dual Blades, Insect Glaive, Sword and Shield, or Long Sword will work well against the Magma Cores on the back of the Zorah Magdaros. Use your mini map to find the Magma Cores, and then rain attacks down on them, pausing and retreating when you see the Magma Cores light up orange, as this indicates that they’re about to spew magma all over you.
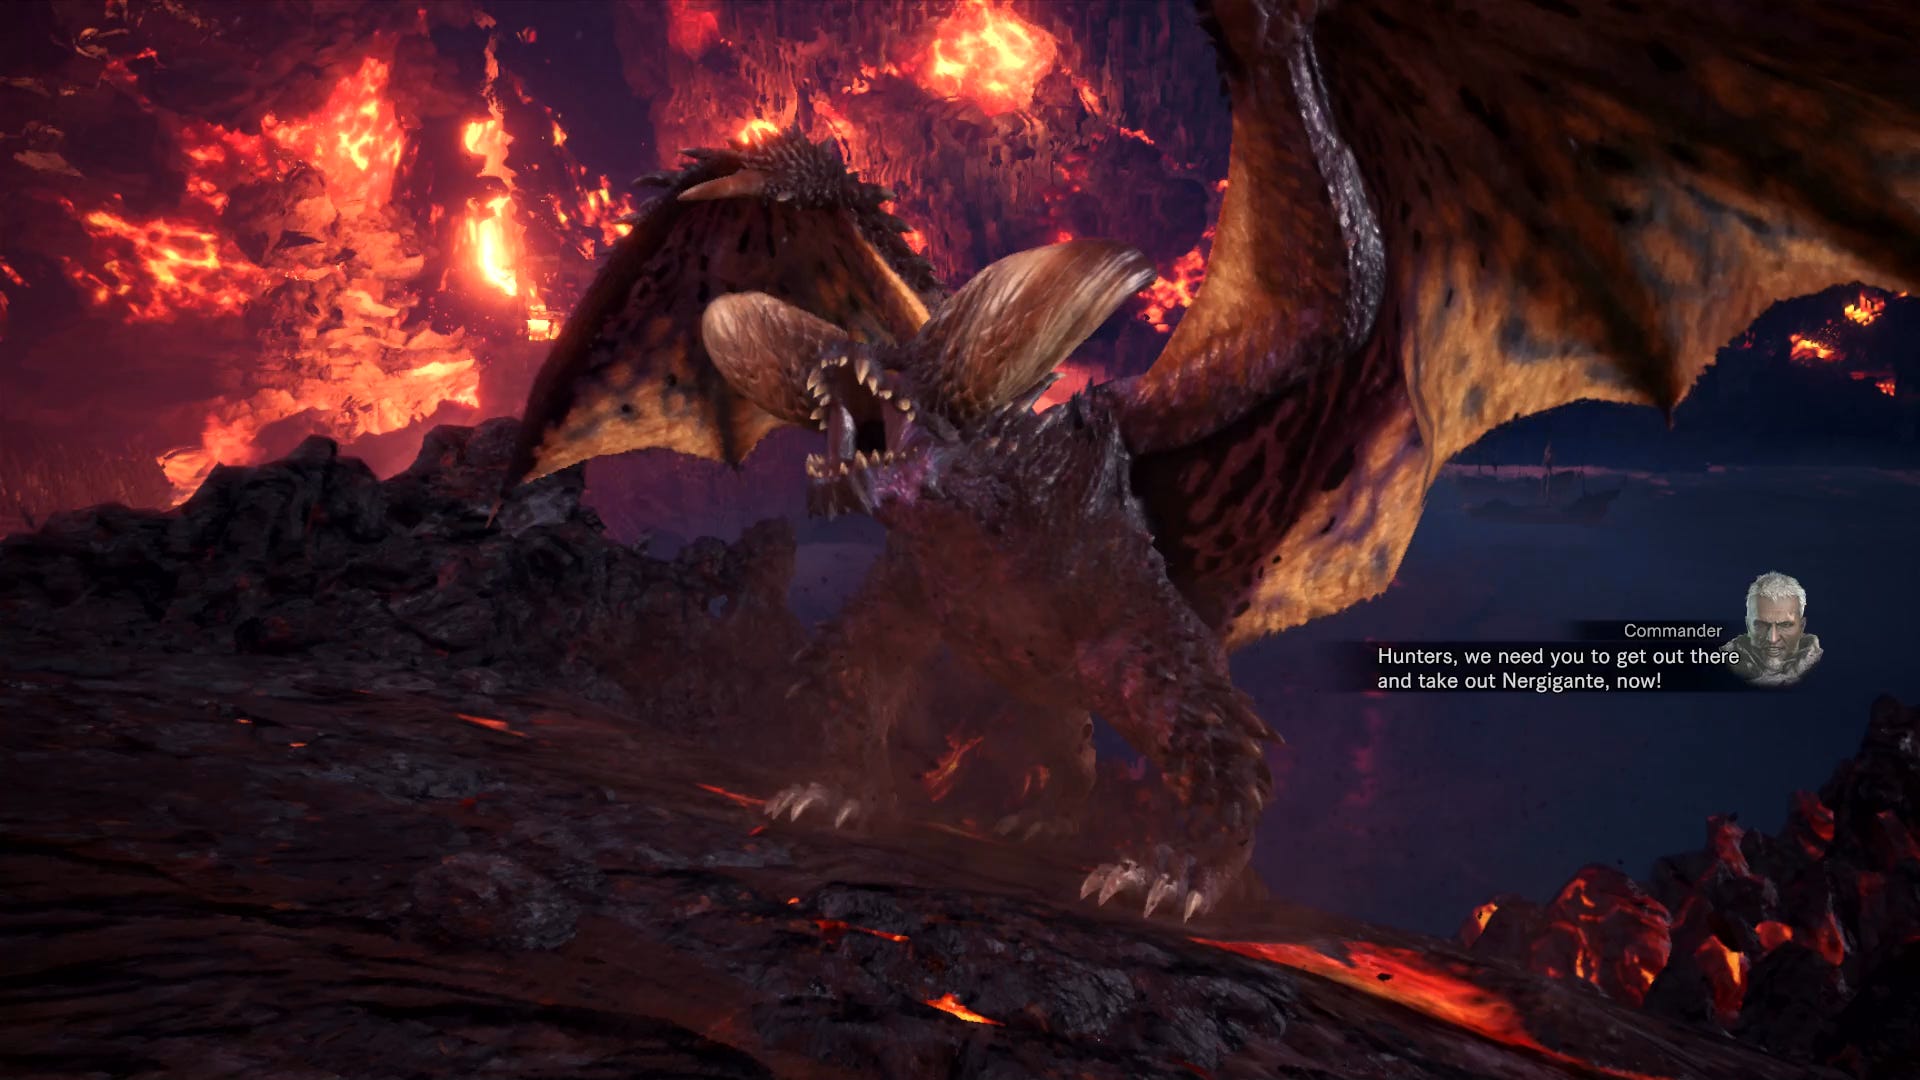
Although the Magma Cores are your priority in the first stage of the Colossal Task mission, a powerful Nergigante will arrive on the back of the Zorah Magdaros after a certain amount of time, and although the Commander orders all hunters to repel the beast, you can actually entirely ignore it, as the Nergigante will fly off after a short while. After the Nergigante has departed, you’ll have to continue your attack on the Magma Cores, before you’re transported via Barndos to the wooden barrier.
At the barrier, you’ll have to use the cannons and ballista to repeatedly attack the Zorah Magdaros, loading up each weapon with the appropriate ammunition, which will always be found near each weapon installment on the barricade. To the very left of the barricade, there’s a point where you can drop down onto the ship below, where you can use several more cannons to attack the Zorah Magdaros, as well as the powerful Dragonator weapon, which can be activated by a switch located near the front of the ship. You’ll have to wait until the Zorah Magdaros is right next to the ship to use the Dragonator however, and the weapon itself is only available to use once every five minutes, so you’ve got to make every shot with it count.
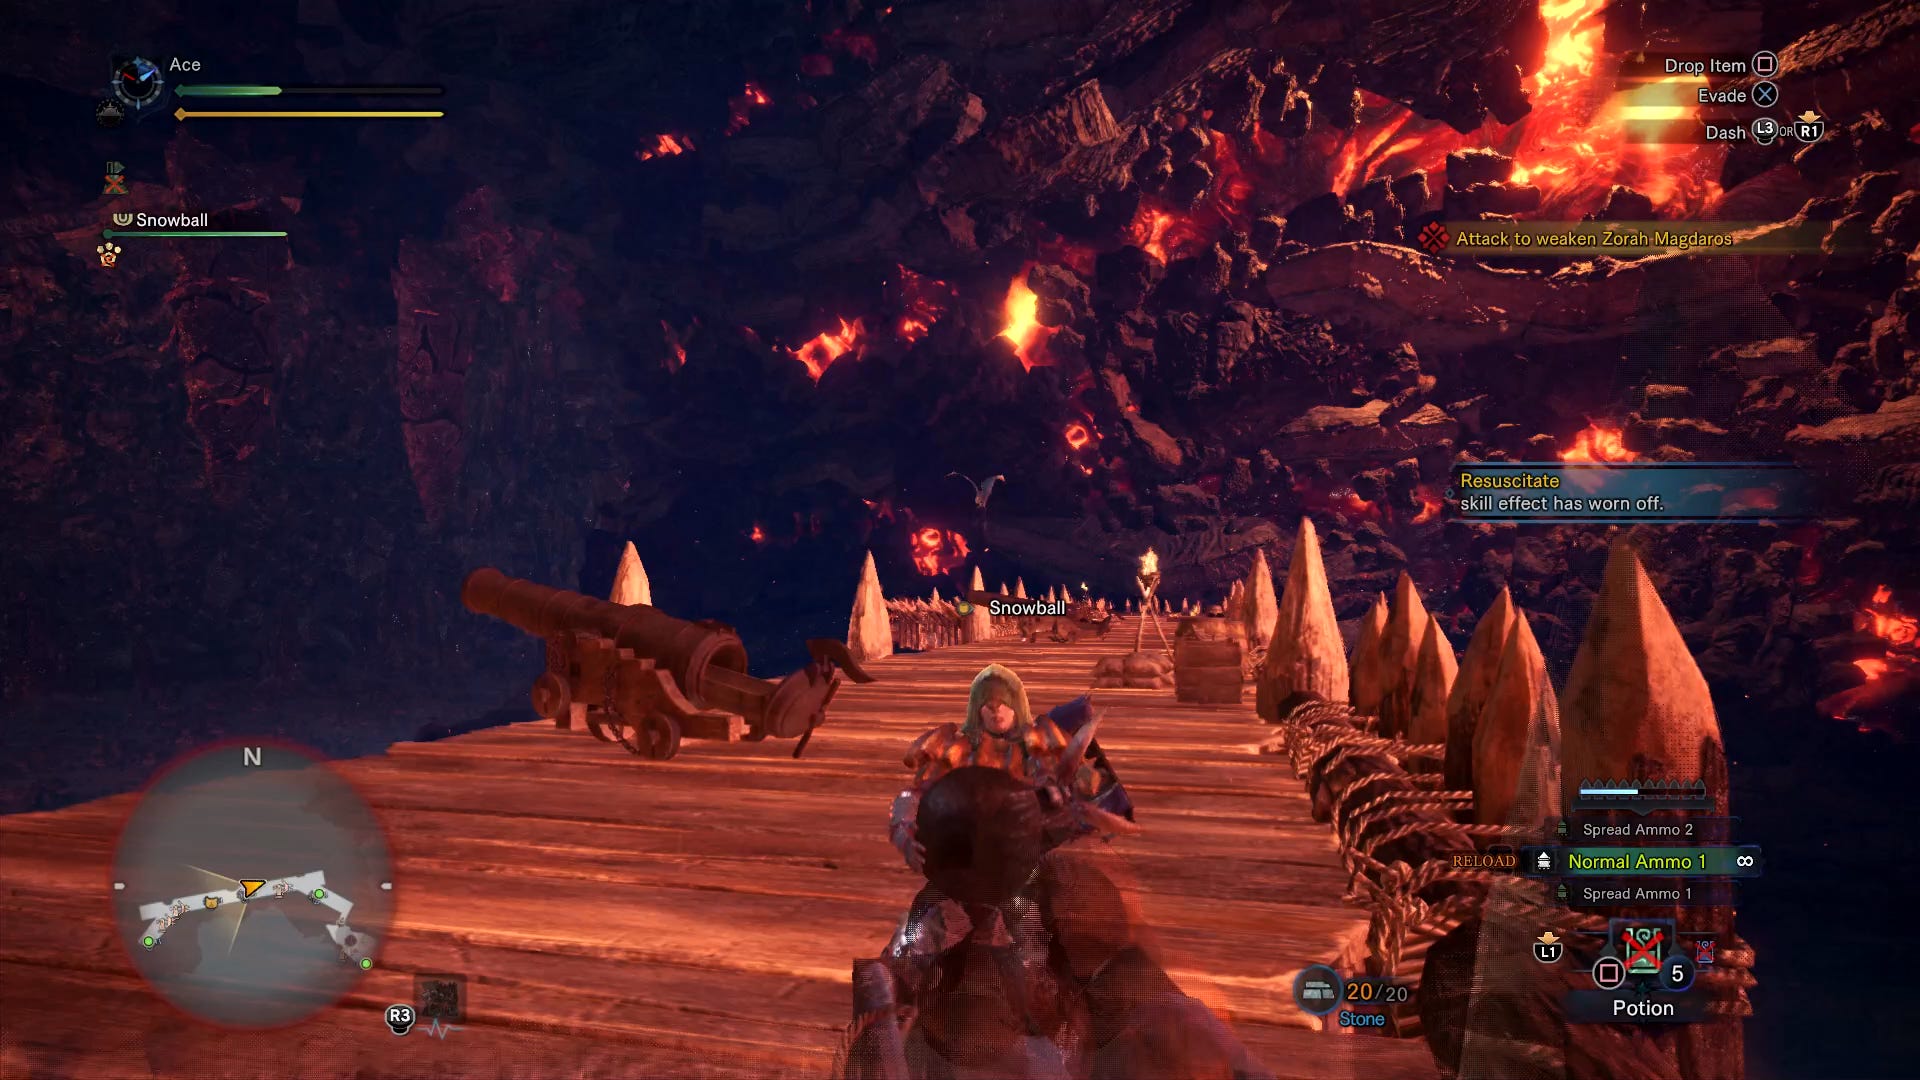
Keep using the cannons, ballista, and Dragonator to your advantage, raining attacks on the Zorah Magdaros whenever it’s in the firing line of a cannon. Note that the NPC hunters along the barricade will assist you in loading cannonballs into each cannon, so an effective way of taking down the Zorah Magdaros is to simply run back and forth to every cannon, activating it once the hunter stationed there has loaded up a few cannonballs. Once you’ve dealt enough damage to the Zorah Magdaros from the barricade, you’ll complete the Colossal Task mission, diverting the Zorah Magdaros back out to sea.
How to Get the Zorah Magdaros Armor in Monster Hunter World
Once you’ve completed the Colossal Task mission in MHW, you’ll be taken to the usual rewards screen, where you’ll have gathered numerous rare items including the Zorah Magdaros Carapace, Heat Scale, Ridge, Pleura, Magma, and Gem. It’s impossible to tell how many of these items you’ll be rewarded with on completing the mission, but you do stand a better chance of gaining additional rare items if you use a Lucky Voucher, on the screen where you accept the mission from the Quest Board.
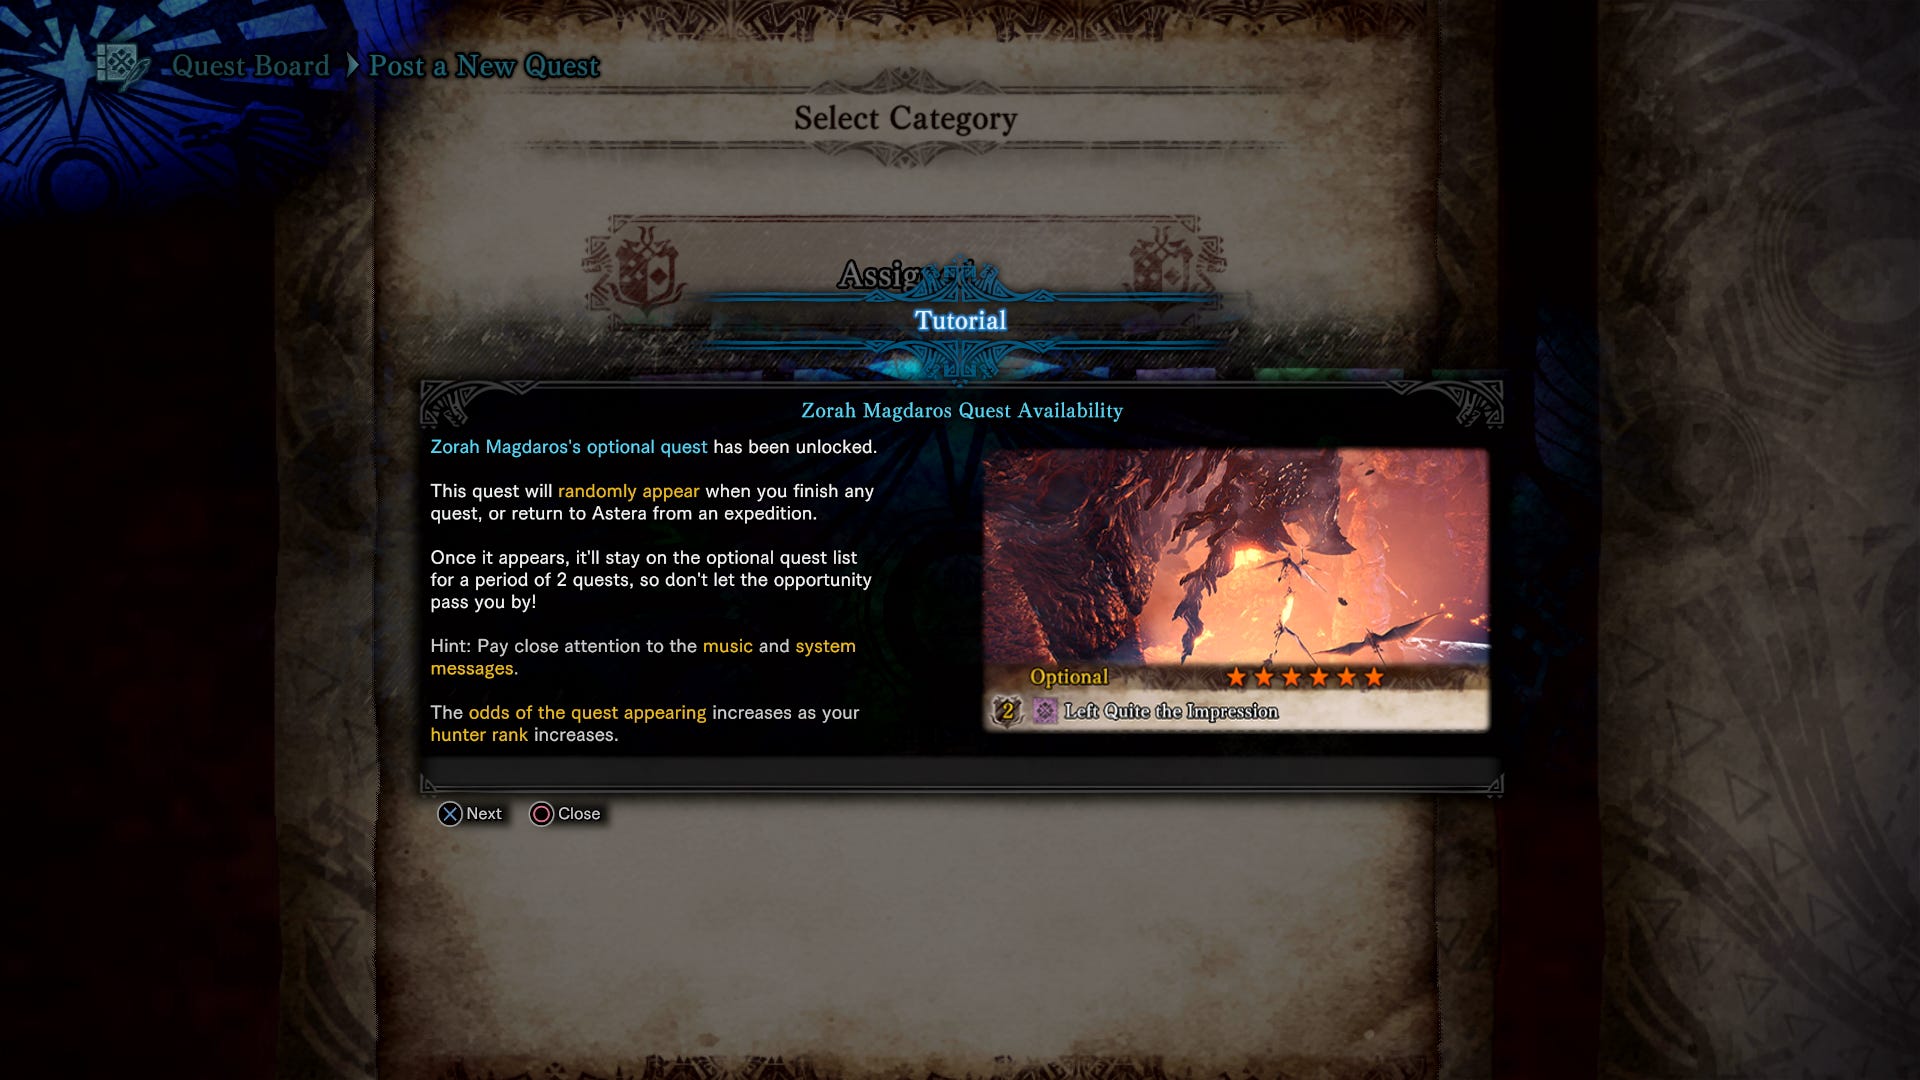
If you now head to the Smithy in the Workshop, you’ll see that you have the option to craft either the Zorah A or Zorah B armor items, in the High Rank section of armor crafting. Crafting these armor items will require many rare items from the Zorah Magdaros itself, but you can actually repeat the quest detailed above, where you have to repel the beast from the barricade. If you head to the Quest Board and select the ‘Optional’ mission, you’ll now see an option for Rank 6 quests, and one of these is titled ‘Left Quite the Impression’. This mission is a full repeat of the Colossal Task quest, but with a catch - you can only undertake it twice before it disappears from the Quest Board.
We’d highly recommend undertaking the Left Quite the Impression quest twice in a row now. You can use it to farm extremely rare Zorah Magdaros parts for crafting the armor sets, but as we mentioned, it’ll disappear if you complete the quest twice. At this point, the Left Quite the Impression quest will return randomly to the Quest Board, and it has a chance of being available whenever you return from a quest or expedition. There’s simply no way of predicting when the quest will reappear after you’ve completed it twice, meaning that we’d recommend using any Lucky Vouchers you’ve got stashed away whenever you play it, as you’ll want to acquire as many Zorah Magdaros parts as you can.
Monster Hunter World Zorah Magdaros Armor Guide
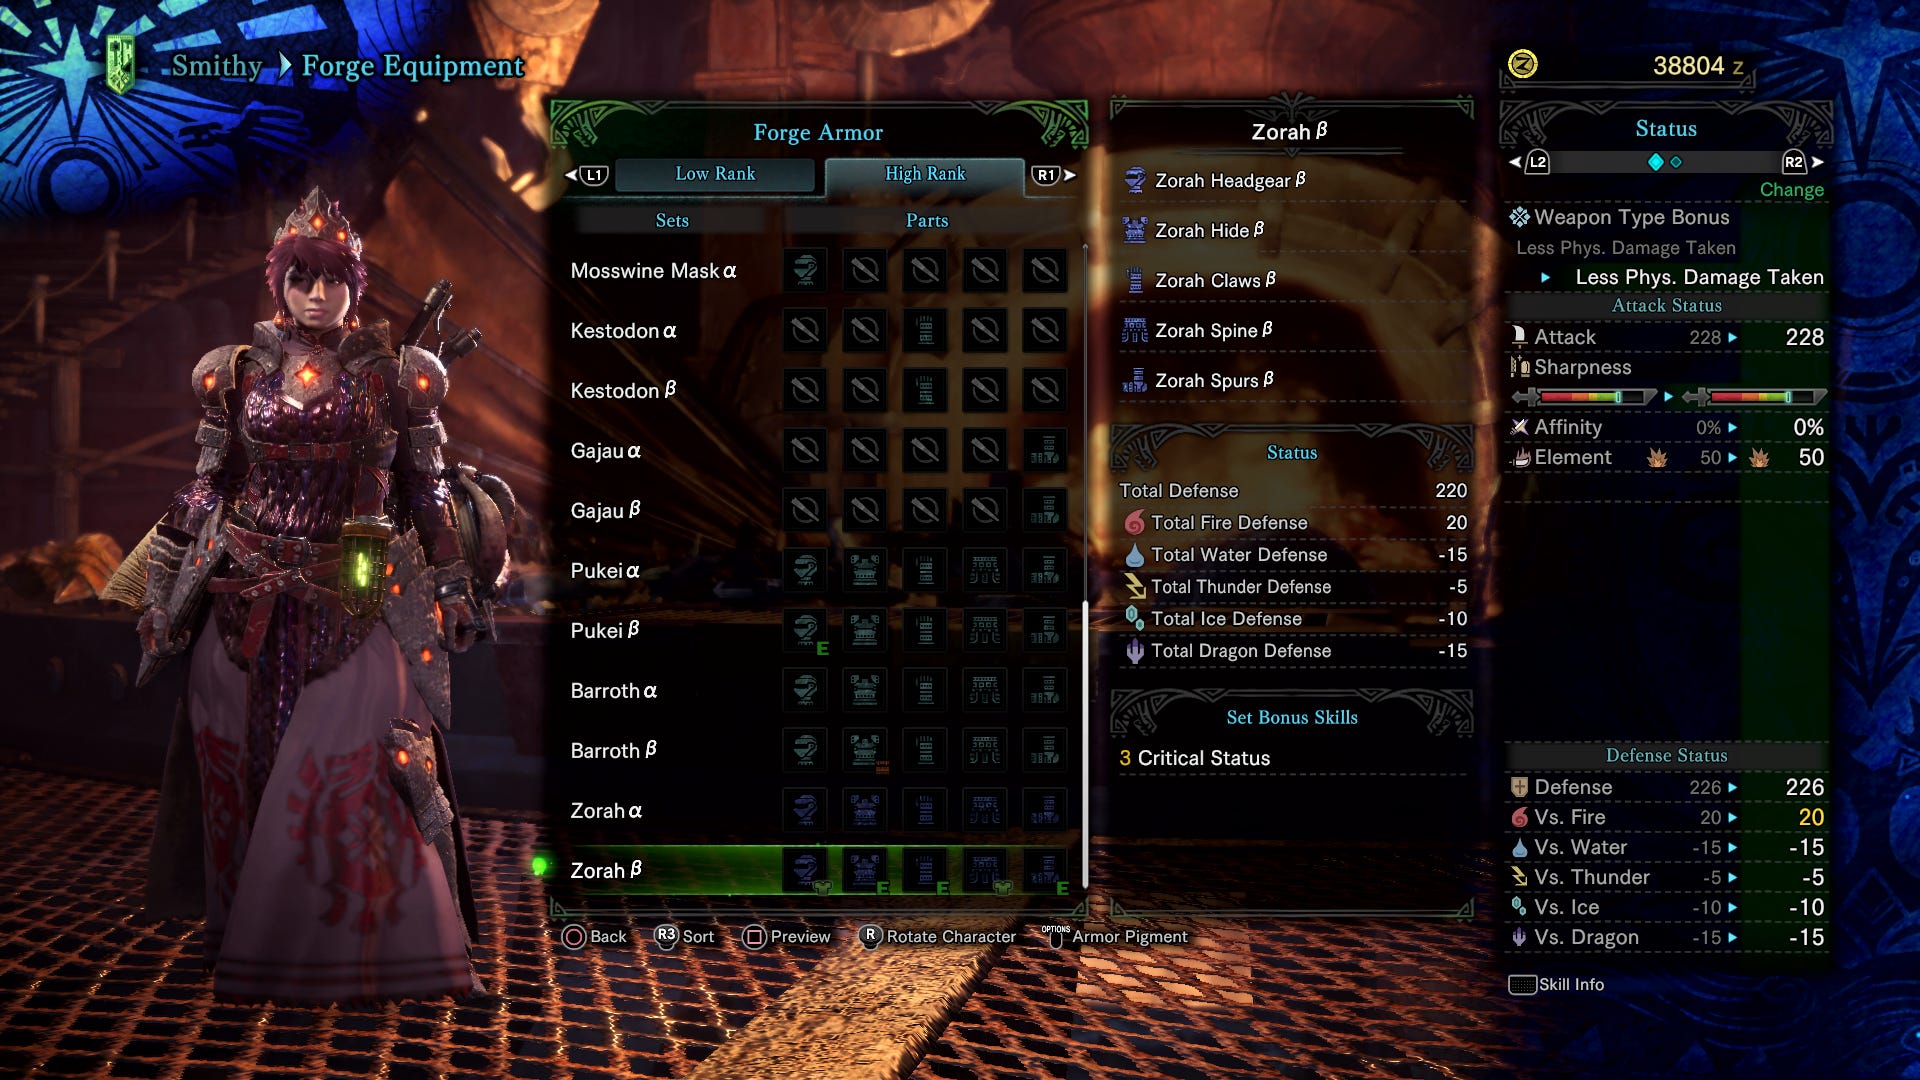
As for the actual Zorah Magdaros armor itself, you have two options available at the Smithy. You can craft items from either Zorah A or Zorah B, mixing and matching headpieces, chest pieces, and greaves from either set as you see fit. Items from both sets require exactly the same parts to craft, so for example the Zorah Headgear A and Zorah Headgear B items will both require three Heat Scales, two Ridges, three Carapaces, and eight Dragonite Ore items for crafting.
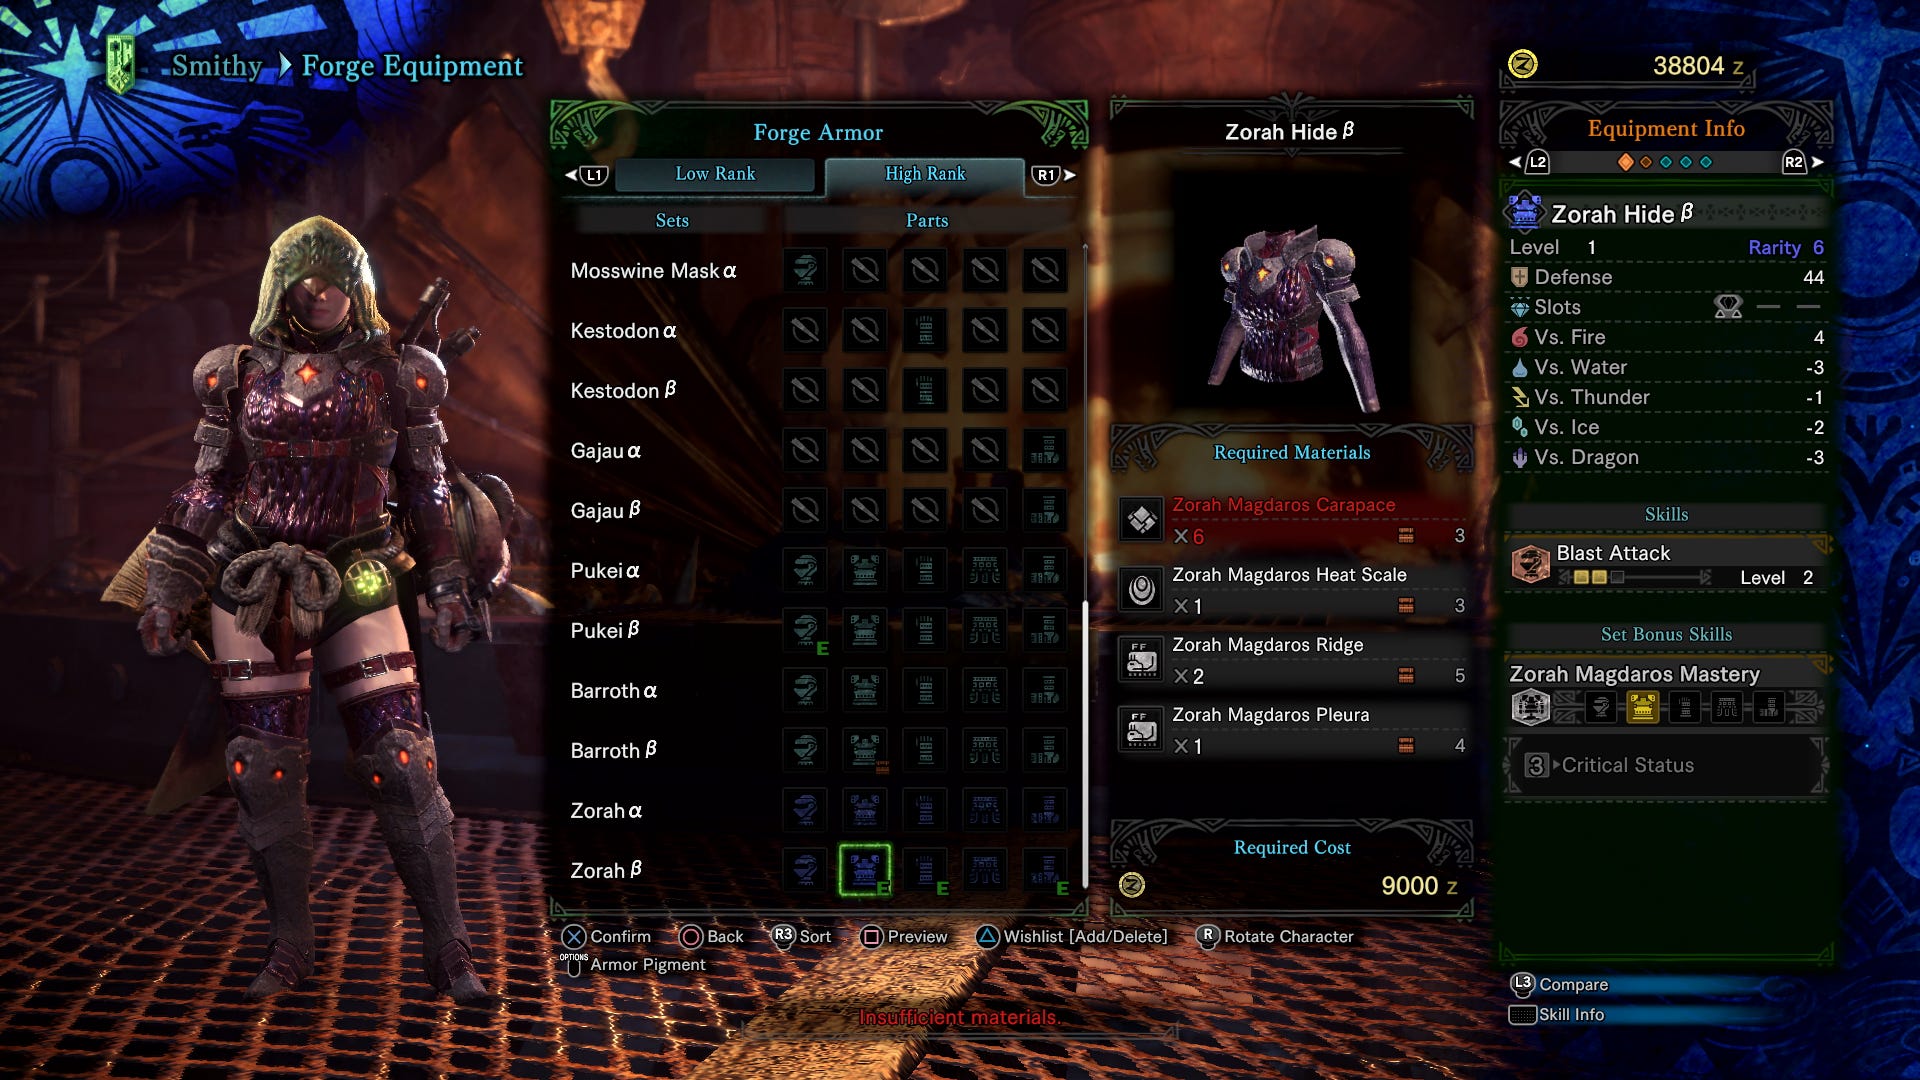
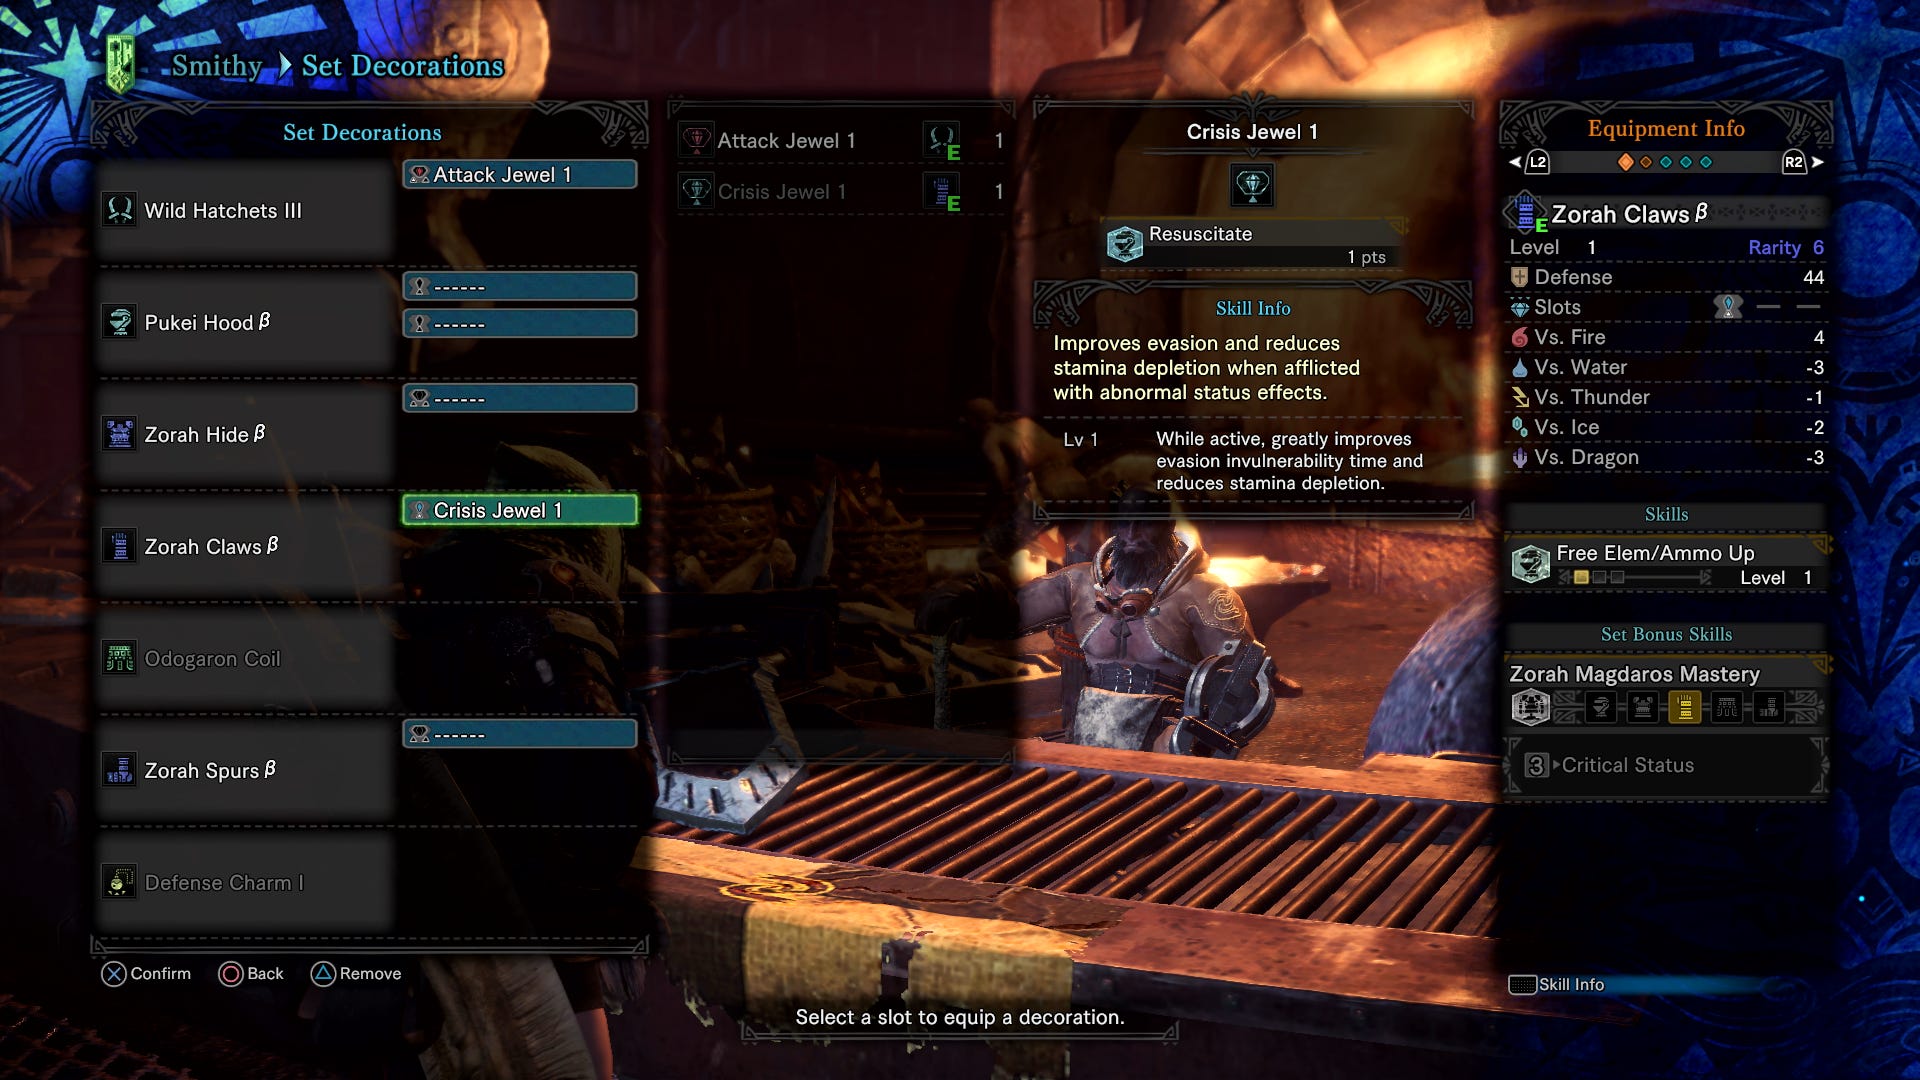
So, which Zorah Magdaros armor set is best? It all depends on what you’re after from your armor items, as the A set items all come with two armor skill slots, whereas the B set items come with just one armor skill slot each, but they have a Decoration slot available, where you can attack Decoration items you’ve acquired from Zorah Magdaros quests and boost certain stats for the armor items. For example, you could equip the Crisis Jewel Decoration, which improves evasion and reduces stamina depletion. Whether you’d rather have the opportunity to attack Decorations, or an additional armor skill, is your choice to make.
We might be all done with the second of our Zorah Magdaros guides, but continue ahead to any of our additional Monster Hunter World guides, including our complete armor guide, as well as our guide on how to obtain the Plunderblade.